Dust is a crucial factor in your CPU service life. Accumulation of excessive dust may reduce its performance and even damage it fast. And you know it's little tough to purchase a new system. That's why cleaning the system unit is an important task for an user.
Couple of weeks ago I clean up my system unit. And I also captured the pictures of my system. Today I'm gonna share my experience with you.
Why Dust is Harmful?
We know dust is very harmful for human. But what's wrong with computer? Isn't it a machine. Yes it is.
But you should know your CPU Main Board, RAM, Processor and other devices produce heat. And to be worked properly this heat should be released. But if there is too much dust in your system unit, then mother board and other devices can't release the heat properly.
If you leave your CPU uncleaned for a long period then it will be damaged soon or you may experience a reduced performance.
How Many Times it Needs to be Cleaned in a Year?
Well it depends. If your CPU is in a dusty place then I recommend to clean in every 03 months.
If your place is less dusty then you should clean it 02 times in a year. And if the place is very neat and clean, then you can go for cleaning once in a year.
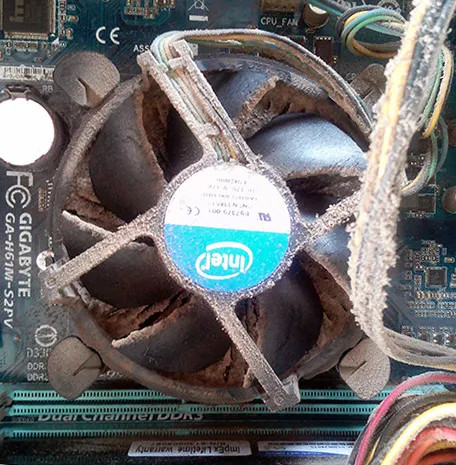
Or you can simply open the cover and check how much dust is accumulated. If it looks like my CPU, then you should clean it immediately.
 |
| System Unit Inside |
Get Ready with the Necessary Tools . . .
- Wear Mask
- Wear Gloves if necessary
- A Blower (if available - not essential)
- Two Paint Brush - Small & Medium
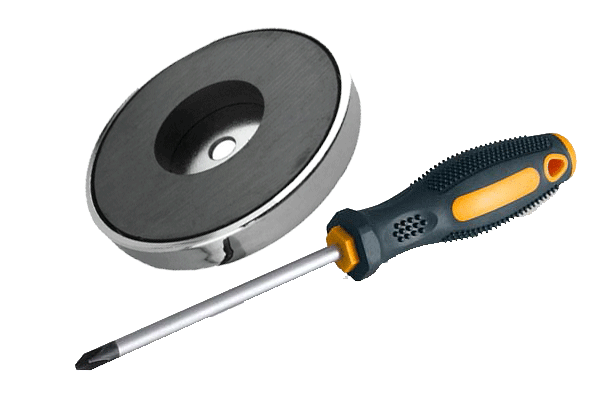
- Star Screw Driver
- A Magnet (To avoid the loss of any screws)
- A Piece of Soft Cloth
- (Be careful about your eyes)
 |
| Air Blower |
Now you're ready to go for cleaning . . .
FIRST PHASE
- Turn off your PC if it's running.
- Disconnect the power.
- Unplug the USB Cables and other Power Cords from CPU.
Now keep your CPU in a open space. Put it over a mat to avoid any scratch in its body. Now gently clean its outside (CPU Case) with the soft cloth.
SECOND PHASE
- Open the case by removing screws.
- Look at the inside and inspect the scenario.
- Use blow machine to remove dust (if you have)
- Use the medium size paint brush to clean dust. Gently brush the main board, CPU Fan, Power Supply, Hard Disk etc. Use cloth to remove them.
- Use the thin paint brush to clean the narrow places.
- Again use the blow machine (if you have)
THIRD PHASE | Handle with Care - Experts only!
(Use magnet to loss of any screw)
- Remove the RAM
- Remove the ATX Cable
- CPU Cooler has four screws. Each screw has plastic cover. Turn the screw heads as directed by arrow. Now pull each screw carefully. Open the power connection of CPU Fan and finally remove it from main board.
 |
| CPU Fan/ Cooler |
 |
| CPU Fan - A Closer Look |
- Remove the power supplier from the casing.
- Again use blow machine to clean each part separately. Or use your paint brushes to clean each of them properly.
- Make sure you've completely removed dust from your main board.
- Don't try to open the power supplier box if you have no previous experience. It's little complicated. And any time there is a chance of disconnection of small cables. So, be careful.
 |
| Power Supplier |
Make sure the mother board and other devices are properly cleaned.
FOURTH PHASE | Assembling
- Install the Power Supplier First. Make sure the screws have been inserted properly. Otherwise it may cause unpleasant noise while running the computer.
- Insert the ATX cable properly. You must hear a click sound.
- Insert the RAM in the slot. Make sure you've got a click sound.
- Before inserting CPU Fan over the processor, you can apply a thin layer of Thermal Grease if available. It's good for you cooling system.
- Turn the plastic heads of CPU Fan's Screws in opposite direction. Now push each of them one by one. Every pin will make a click sound if inserted properly.
Make sure everything is installed properly. Check whether any screw left in the magnet. Now insert the CPU cover. Insert the cover screws.
Insert all the cables properly and then power on your machine.
Precautions
I must say, this is not a game of child. There are some risks associated. You need to handle with care to avoid any accident. Improper handling may cause you injury and your machine might be damaged as well.
Safety first! If you're not experienced enough, then don't try these all. Simply open the CPU cover and use blow machine. If you do this once in a month then you don't need to do the above tasks.
Serve your machine and it will serve you . . .


Comments
Post a Comment